Template is also by meFont of Choice - Strange and WeirdI used a mask by me - AKK_Mask035Plugins Used: Eye Candy 4000 Glass, DSB Flux-Bright Noise, Muras MeisterI Used 1 of my Free kits
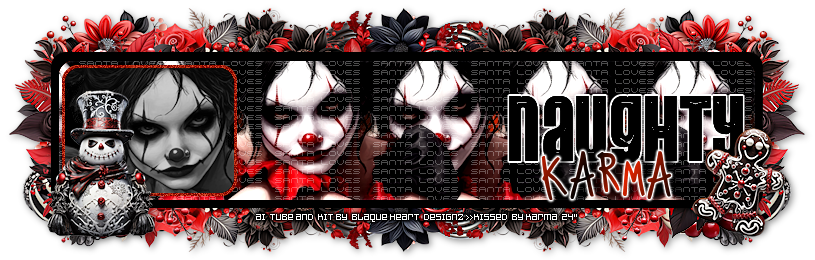
BHD_GothicXmas
Template & Tube : HERE
**Abbreviations I use**DS- Drop ShadowLP-Layer PaletteRS-Resize
DONT FORGET TO SHARPEN and ADD DROP SHADOW to EVERY ELEMENT!
Open Santa_Naughty2 TemplateShift+D to duplicate and close out your original templateresize your canvas to 815x260
activate Lil Black RectSelections-Select AllSelections-FloatSelections-DefloatOpen your tube BHD_FTUTube-Clown24 (or tube of choice)(keep your tube opened in PSP!)Edit-CopyEdit-Paste as new layer on your template and select your *MOVE* toolplace your tube where you would like it in the rectSelections-Invert and press deleteBlend mode Luminance Legacy Opacity 82
activate your Lil Black RectSelections-Select AllSelections-FloatSelections-Modify-Expand by 3add a new raster layer name it Lil Rect Borderflood fill with color of choicePlugins-DSB Flux-Bright Noise-Intensity 35Sharpen and move below your Lil Black Rect layer
Activate Gradiant RectSelections-Select AllSelections-FloatSelections-Defloatgo back to your tube canvasPlugins-Muras Meister Copies-Line with these settings
Edit copyEdit-Paste as new layer on your template and select your *MOVE* toolplace your tube where you would like it in the rectSelections-Invert and press deletePlugins-Xero-Bad Dream with these settings
Activate your pxl txt and change the opacity to 30
Now the next elements are all going to be UNDER ourBlack Rect Layer
Drag element 273 onto your LP & RS 30%place all the way towards the leftDuplicateImage-Mirror-Mirror Horizontal
Drag element 283 onto your LP & RS 25%place below el 273 to the leftDuplicate and do the same Mirror as above
Drag element 285 onto your LP & RS 25%place below element 283 to the bottom leftDuplicate and do the same Mirror as above
Drag element 287 onto your LP & RS 25%place below element 283 slightly to the rightDuplicate and do the same Mirror as aboveMerge your copy of el 287 down into el 287DuplicateImage-Mirror-Mirror Vertical
Drag element 279 onto your LP & RS 25%place below element 287 as shown in tagDuplicate-Image-Mirror-Mirror HorizontalMerge your copy of el 279 into el 279Duplicate-Image-Mirror-Mirror Vertical
Drag element 282 onto your LP & RS 25%place below element 285 and move this to the center bottomas shown in tagDuplicateImage-Mirror-Mirror Verticalyour template should be looking like this now
Drag element 107 onto your LP & RS 30%place below element 282 and move towards the top to fill in those gaps that are shown in the Screenshot aboveDuplicateImage-Mirror-Mirror Vertical
Drag element 72 onto your LP & RS 25%place below el 279 all the way to the left side towards the bottomDuplicateImage-Mirror-Mirror Horizontal
Drag element 55 onto your LPImage-Free Rotate-Right-Free 20RS 15%place above your Naughty Glass Layer
Drag element 7 onto your LP & RS 20%place below element 55 and move it all the way towards the leftas shown in tag
Crop your tagadd your copyrights and name(s)
and we are done!!!
Hope you enjoyed!!xx


Template is also by meFont of Choice - Strange and WeirdI used a mask by me - AKK_Mask035Plugins Used: Eye Candy 4000 Glass, DSB Flux-Bright NoiseI Used 2 of my Free kits
BHD_HallowsHorrorCarnivalBHD_GothicXmas
Template & Tube : HERE
**Abbreviations I use**DS- Drop ShadowLP-Layer PaletteRS-Resize
DONT FORGET TO SHARPEN and ADD DROP SHADOW to EVERY ELEMENT!
I will be using two different kits for this tagI will state which kit we are in as we go along!This is for the Goth Challenge in Misfits which thechallenge is Opposites!Hence Christmas and a clown!
**NOTE**If you want your tube or papers smaller before you put themon your template canvas into your shape layers you have toRESIZE it BEFORE you paste as new layer onto your template canvas
Alrighty lets do this!!
Open Santa Naughty TemplateShift+D to duplicate and close out your original templateResize your canvas to 790x250in your LP delete the credits
Open your tube BHD_FTUTube-Clown24 (or tube of choice)(keep your tube opened in PSP!)C&P onto your LP & RS 61% - Sharpen your tube Place this below your Santa Txt Layer in the centerDuplicate your tube and go to Adjust-Blur-Gaussian Blur:3Blend Mode-Screen-Opacity 75Merge down into your original tube layeradd DS - V:0, H:5, Opacity:80, Blur:10
We are using BHD_HallowsHorrorCarnival for this portion
Activate your Center Rect in your LPSelections-Select AllSelections-FloatSelections-DefloatOpen paper 5 & RS to 75%Edit-Copy Edit-Paste as new layer on your template and select your *MOVE* tool
place where you would like in the center rectSelections-InvertHit DeleteRename Center Paper RectIn your LP delete your original Center Rect layer (the black one beneath it)
Activate your Center Paper Rect in your LPSelections-Select AllSelections-FloatSelections-Modify-Expand by 5Add new Raster Layer name it Center Border
Flood fill with color of choicePlugins-DSB Flux-Bright Noise with these settings
Sharpenmove this below your Center Paper Rect layer
Activate your Grad Rect Right in your LPSelections-Select AllSelections-FloatSelections-DefloatGo back to your BHD_FTUTube-Clown24 and Edit-CopyEdit-paste as new layer onto your template Select your *MOVE TOOL*and place your tube in the rect where you would likeSelections-InvertHit deleteBlend mode screenRename Tube RightNowDuplicate Tube RightRename Tube LeftImage-Mirror-Mirror HorizontalIn your LP drag Tube Left above Grad Rect Left
Activate Skinny Rect RightSelections-Select AllSelections-FloatSelections-DefloatOpen paper 3 & RS 55%Edit-CopyEdit-Paste as new layer and select your *MOVE TOOL* and place to the right as shown in tagRename Paper Rightdelete your Skinny Rect Right layer
Duplicate and rename "Paper Left"Image-Mirror-Mirror HorizontalIn your LP drag "Paper Left" above your Skinny Rect Left Layerdelete your Skinny Rect Left layer
Activate your "Paper Right" Layer Selections-Select AllSelections-FloatSelections-Modify-Expand by 3Add new Raster Layer name it Paper Right BorderFlood fill with color of choicePlugins-DSB Flux-Bright Noise BUT change the intensity to 100SharpenDuplicate and rename Paper Left BorderImage-Mirror-Mirror HorizontalDrag below your Paper Left Border
Now we are going to use BHD_GothicXmas
Drag element 289 onto your LP & RS 40%place below Skinny Rect Top to the leftDuplicate-Mirror-Mirror HorizontalMerge down the copy of El 289 into El 289 layerDuplicate-Image-Mirror-VerticalMerge down the copy of EL 289 into El 289 layerthis is what it will look like in your LP
Drag element 288 onto your LP & RS 40%place below El 289 to the left side of canvas so it peeks out a bitDuplicate-Image-Mirror-Mirror Horizontal
Drag element 273 onto your LP & RS 40%place below El 288 all the way to the bottom right as shown in tagDuplicate-Image-Mirror-Mirror HorizontalMerge down the copy of El 273 into El 273 Duplicate-Image-Mirror-Vertical
Drag element 282 onto your LP & RS 40%place below element 273 and move to the top leftDuplicate-Mirror-Mirror HorizontalMerge down the copy of 282 into El 282 and DuplicateImage-Mirror-Mirror Vertical
Drag element 149 onto your LP & RS 40%place below el 282 to the leftDuplicateImage-Mirror-Mirror Horizontal
Now we are going to use BHD_HallowsHorrorCarnival kit
Drag element 62 onto your LP & RS 30%place above Copy of El 273 to the leftDuplicateImage-Mirror-Mirror HorizontalMerge down the copy of 62 into El 62 and DuplicateImage-Mirror-Mirror Vertical
Drag element 68 onto your LP & RS 40%place below El 149DuplicateImage-Mirror-Mirror Horizontal
Drag element 69 onto your LP & RS 40%place below El 68 towards the bottom rightDuplicateImage-Mirror-Mirror Horizontal
Drag element 4 onto your LP and RS 30%place above Skinny Rect Top to the right as shown in tag
Drag element 8 onto your LP & RS 25%place below your tube layer to the right
Drag element 25 onto your LP & RS 35%place below el 8 to the left
Now we are going back to BHD_GothicXmas Kit
Drag element 51 onto your LP & RS 20%place above element 25 towards the bottom
Drag element 198 onto your LP & RS 25%place below your tube layer to the left
Drag element 202 onto your LP & RS 25%place below element 198 as shown in tag
Drag element 226 onto your LP & RS 20%place below element 202 as shown in tag
Drag element 7 onto your LP & RS 25%place above element 198 to the left
Drag element 72 onto your LP & RS 25%place below element 25 to the right as shown in tag
Drag element 300 onto your LP & RS 50%place below element 226 up towards the left as shown in tag
Drag element 297 onto your LP & RS 25%place below element 72 as shown in tag
Drag element 287 onto your LP & RS 25%place below element 297 all the way to the left of canvas as shown in tagDuplicateImage-Mirror-Mirror Horizontal
Drag element 221 onto your LP & RS 20%place above your Skinny Rect Top layerto the left as shown in tag
Drag element 218 onto your LP & RS 45%place below element 221 towards the left
Drag element 102 onto your LPImage-Free Rotate-Left 20 & RS 35%Place below Paper Left Border to the left as shown in tagDuplicateImage-Mirror-Mirror Horizontal
Drag element 55 onto your LPImage-Free Rotate-Right 20 & RS 20%place below Copy of El 102 to the right as shown in tag
Drag element 38 onto your LP & RS 20%place below El 7 to the left as shown in tag
Drag paper 11 onto your canvasand add your mask layer I used AKK_Mask035
Crop your tagAnd we are done!Add your copyright and name(s)
Hope you enjoyed!!
xx
Here are some FTU Self Love Word Artsyou can download them HERE
Enjoy!
Here are some FTU Autumn Word Artjust right click and save!
Enjoy!
PVS
Here are some FTU Goth Word Artjust right click and save!
Enjoy!
This tutorial was written by Ashley Zimmerman on 8/6/2024Any resemblance to any other tutorial is coincidental.Supplies I Used:PSP – I used 2020 but any version will doTube of Choice- Enamorte 84-2Font of Choice - I used The maria storyI used a mask by me - Summermask-01-KK24 HEREand also used a 2nd mask - Suz cmbbmask12Plugins Used: Eye Candy 4000 Glass, Xero-Bad DreamI Used Stus kit Entry To Evil HEREI Used 2 FTU Animations from Simone:
SimoneAni-LightningSpecial-02 and SimoneAni-LadyVampire-07Just click the names of the animations and it will take you to them!
Here is my Wordart you can use
(the steps are still below if you want to type out something else!)
**Abbreviations I use**DS- Drop ShadowLP-Layer PaletteRS-Resize
DONT FORGET TO SHARPEN and ADD DROP SHADOW to EVERY ELEMENT!
Drop Shadow used in this Tutorial is:V:0, H:5, opacity:80, Blur:10
Lets make a quick animated sig!
open a new canvas 700x200Selections-Select AllSelections-Modify-Contract by 3Selections-InvertFlood fill with color of choiceSelections-Select none
Do the selections steps above again BUT this time contract by 8and flood fill with color of choice add ds (V:0, H:5, opacity:80, Blur:10)
Drag paper 20 onto your LP & RS 70%C&P your tube layer place this above your paper layer all the way to the rightPlugins-Xero-Bad Dream
select your text tool and type out EVIL in a BOLD fontI used Pink Rocket the size is 150 Convert your text layer to a raster layer-rename text layermove below your tube layerand place where you would likeWith your text Layer still activeSelections-Select AllSelections-FloatSelections-Modify-Expand by 2in your LP add a new raster layer and move this beneath your text layerand flood fill with color of your choiceAdjust- Add/Remove Noise-Add Noise-Uniform, Noise:60, monochrome checkedsharpen - Selections- Select None-rename glitter layer
Activate your text layerSelections-Select AllSelections-FloatSelections-Defloatin your LP add a new raster layer (Keep this above your text layer!)Effects-Plugins-Eye Candy 4000-Glass with these settings
selections-select nonerename this glass layer
select your text tool again and type out Entry To - font I used was Bank Gothicconvert to raster layer(you want this layer above your glass layer)Effects-Plugins-Eye Candy 4000- Gradient Glow with these settings
I use Medium in the SS
Activate your glitter layer and add DS of choiceI used V:0, H:10, Opacity:85, Blur:10
Drag element 91 onto your LP & RS 20% place below your tube layer as shown in tagsharpen and DS (do this to every element!)Drag element 96 onto your LP & RS 15% place below element 91 as shown in tagDrag element 53 onto your LP & RS 25% place above your paper layer as shown in tagDuplicate element 91 , rename El 91 left and place above element 96 to the left Duplicate element 96, rename El 96 left and move to the left as shown in tagDuplicate El 91 left and move to the very left side of your canvas as shown in tagDrag element 78 onto your LP & RS 30% place above your paper layer all the way to the left of your canvas
C&P your tube layer and place above your paper layer as shown in tagAdjust-Blur-Gaussian Blur-3
If you aren't animating then you are done here add your copyright and name(s)
Animation-
Open Jasc Animation Shop and open your animationsI am using SimoneAni-LightningSpecial-02 and SimoneAni-LadyVampire-07
In PSP Layers-View NoneActivate your Paper Layer and Tube Layer
Now activate only your paper layer where the finger is pointing in SSEdit-Copy Special-Copy Merged
Back to AS Edit-Paste as new animationCTRL+L and make sure you have 15 frames same as our animationEdit- Select AllEdit-Propagate Paste
Activate your animation
SimoneAni-LightningSpecial-02we are going to resize this animation settings below:
Edit-Select AllEdit-Copy
Activate your sig Edit-Paste into selected frame and place where you would like
Back to PSP
Layers-View NoneActivate all your layers above our tube and paper layer we usedDO NOT make your paper layer and tube layer active again!CTRL and click on each layer in your LP and make visibleactivate your bottom layer which should be Element 78
Edit-Copy Special-Copy Merged Back to AS
On your sig tagEdit-Paste into selected frame
Activate animation Lady VampireDelete frame 16(we need 15 frames like our other animation!)Edit-Select AllEdit Copy
Activate your sigEdit-Paste into selected frame place this above your letter L in EVILgo back to your animation Lady Vampire and select Animation - Mirror
Edit-Copy
Activate your sigEdit-Paste into selected frame above your E in Eviland we are done!
Hope you enjoyed
xx

This tutorial was written by Ashley Zimmerman on 8/6/2024Any resemblance to any other tutorial is coincidental.Supplies I Used:PSP – I used 2020 but any version will doTube of Choice- Enamorte 84-2Font of Choice - I used The maria storyI used mask - Suz cmbbmask12 (its my favorite mask lol)Plugins Used- Muras MeisterI Used Stus kit Entry To Evil HERE
**Abbreviations I use**DS- Drop ShadowLP-Layer PaletteRS-Resize
DONT FORGET TO SHARPEN and ADD DROP SHADOW to EVERY ELEMENT!
Drop Shadow used in this Tutorial is:V:0, H:3, Opacity:80, Blur:10
I am going to try to do a simple tag tutorial wish me luck!
Lets go!
Open new canvas 800x800Drag frame 2 onto your LPDrag paper 6 onto your LP and move below your frame layeractivate your frame layer - grab your magic wand and select inside the frameSelections-Modify-Expand to a 5Selections-InvertActivate Paper 6 and hit delete
Drag element 76 onto your LP & RS 25% leave it where it isDrag element 81 onto your LP & RS 25% place below element 76activate element 76 and move it over to the left a little bitactivate element 81 and move it over to the right a little bitactivate element 76 and merge down into element 81Plugins-Muras Meister Copies with these settings
place below your paper layer-Objects-align-center in canvas
Drag element 77 onto your LP & RS 25% - Muras Meister Copies again BUTchange number to 14, Shift X and Shift Y to 58 place below merged flowers 1 layer - Objects-align-center in canvasDrag element 90 onto your LP & RS 20% leave it where it isDrag element 94 onto your LP & RS 20% move it over to the left of element 90 a little bitmerge down into element 90Muras Meister Copies BUT change number to 12, Shift X and Shift Y to 65Objects-align-center in canvas and place below element 77 Drag element 98 onto your LP & RS 20% leave it where it isDrag element 96 onto your LP & RS 20% move it over to the left a little bitActivate element 98 and move it over to the right a little bitActivate element 96 and merge down into element 98
Muras Meister Copies BUT change Shift X and Shift Y to 67 - Objects-align-center in canvasadd this DS to your flower layers V:0, H:3, Opacity:80, Blur:10
C&P your tube layer above your frame layerSharpen, duplicate your tube- adjust- blur-gaussian blur:3Blend mode- Screen - Opacity 74 merge down into your original tube layer add DS
Drag element 53 onto your LP & RS 40% place below your tube layer to the leftDrag element 19 onto your LP & RS 30% place above your tube layer as shown in tagDrag element 17 onto your LP & RS 30% place above element 53 as shown in tagDrag element 81 onto your LP & RS 30% place below element 19 to the left Duplicate and rename El 81 right Image- Mirror-Mirror horizontalDrag element 97 onto your LP & RS 20% place below element 81 to the left Duplicate and rename El 97 right Image- Mirror-Mirror horizontalDrag element 66 onto your LP & RS 20% place below your tube layer to the left as shown in tagDrag element 78 onto your LP & RS 30% place above element 17 down to the left as shown in tagDuplicate and rename El 78 right Image- Mirror - Mirror HorizontalDrag element 48 onto your LP & RS 30% place below element 78 right Drag element 45 onto your LP & RS 13% place above element 19 upper right corner as show in tagDrag element 27 onto your LP & RS 15% place above element 19 bottom leftDrag element 12 onto your LP & RS 15% place below element 27 to the leftDrag Paper 4 onto your LP move this all the way to the bottom and add your mask!Crop your tag.Add your copyrights and name (s) and we are done!!
Hope you enjoyed!!xx
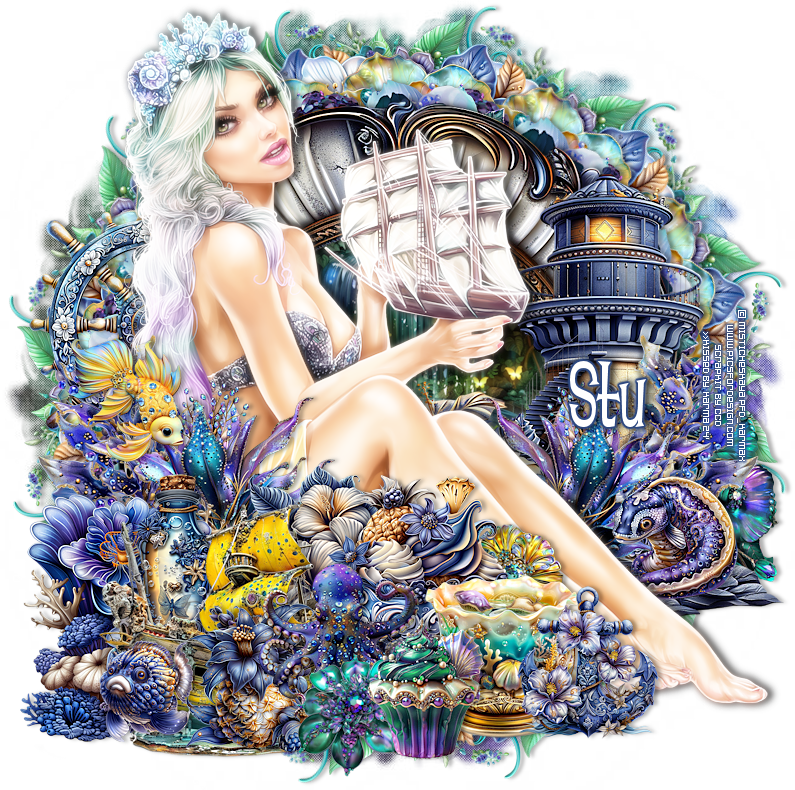
This tutorial was written by Ashley Zimmerman on 8/6/2024Any resemblance to any other tutorial is coincidental.Supplies I Used:PSP – I used 2020 but any version will doTube of Choice- Magical Song by MisticheskayaFont of Choice - I used Lounge BaitMask Used - Suz cmbbmask12I Used Stus kit Colors Of The Ocean HERE
**Abbreviations I use**DS- Drop ShadowLP-Layer PaletteRS-Resize
DONT FORGET TO SHARPEN and ADD DROP SHADOW to EVERY ELEMENT!
Drop Shadow used in this Tutorial is:V:0, H:4, Opacity:30, Blur 5.00
Lets Go!!
Open a new canvas 800x800Drag frame 4 onto your LP & RS 60% - Objects-Align-Center in CanvasDrag paper 6 onto your LP below your frame layer and RS 60%activate your frame layer select your magic wand , click inside the frame- selections-modify expand by 5-selections-invertactivate your paper layer and hit delete
Drag element 97 onto your LP & RS 40%Plugins- Mura Meister Copies- Encircle with these settings
drag below your paper layer objects-align-center in canvasDrag element 88 onto your paper & RS 30%Muras Meister - same settings as above drag below element 97 objects-align-center in canvasDrag element 102 onto your LP & RS 30%Muras Meister - change Shift X and Shift Y to 60place between element 97 and 88 objects-align-center in canvasDrag element 86 onto your LP & RS 45%Muras Meister (60 for Shift X and Shift Y)move below element 88 objects-align-center in canvasfor all of your flower layers sharpen them and add ds (V:0, H:4, Opacity:30, Blur 5.00)
C&P your tube layer above your frame layer and RS 43%place to the leftSharpen , Duplicate, Adjust-Blur-Gaussian Blur 3.00Blend mode ScreenMerge down into your main tube layer add DS change your settings to these
(V:0, H:4, Opacity:80, Blur:10.00)
Drag element 67 onto your LP place above your tube layer to the left of her feet(I want her feet showing)Drag element 54 onto your LP & RS 65% and place above your paper layerDrag element 15 onto your LP & RS 20% place below element 67 to the left and up a little bitDrag element 48 onto your LP & RS 30% place above element 67 to the left Drag element 91 onto your LP & RS 20% place below element 48 to the leftDrag element 89 onto your LP & RS 20% place below element 15 to the left and up a little bitDrag element 83 onto your LP & RS 35% place below element 91 as shown in tagDrag element 73 onto your LP & RS 40% place above element 89 a little to the left as shown in tagDrag element 70 onto your LP- Image-Free Rotate-Left-Free 20 and RS 20% place below element 15 to the rightDrag element 23 onto your LP & RS 10% place above element 73 to the leftDrag element 20 onto your LP & RS 20% place above your tube layer to the leftDrag element 18 onto your LP & RS 25% place below element 20 to the left (ignore the following step below if you are using a different tube) activate your tube layer and get your eraser tool to erase any tube showing on the bottom leftDrag element 79 onto your LP & RS 40% place below element 18 slightly to the right Drag element 80 onto your LP & RS 40% place below element 79 slightly to the left Drag element 75 onto your LP & RS 20% place above element 79 as shown in tagDrag element 12 onto your LP & RS 15% place below element 83 slightly to the leftDrag element 8 onto your LP & RS 15% place above element 67 to the rightDrag element 10 onto your LP & RS 45% place below your tube layer to the right Activate element 79 and duplicate iton the duplicate - Image-Mirror Horizontal and move below your tube layer- rename this 79 rightActivate element 80 and duplicate iton the duplicate - Image- Mirror Horizontal and move below your 79 right elementDrag element 19 onto your LP & RS 13% place below your tube layer to the right to where it is on the rocksDrag element 93 onto your LP flip horizontal & RS 35% place below element 10 to the right grab your eraser tool and erase the little bit peeking underneath the rock at the bottomDrag element 11 onto your LP & RS 25% place below your tube layer all the way to the leftDrag paper 7 onto your canvas move this all the way to the bottom and add your maskadd copyright and name(s)and we are done!
Hope you enjoyed!
xx


.png)
.png)
.png)