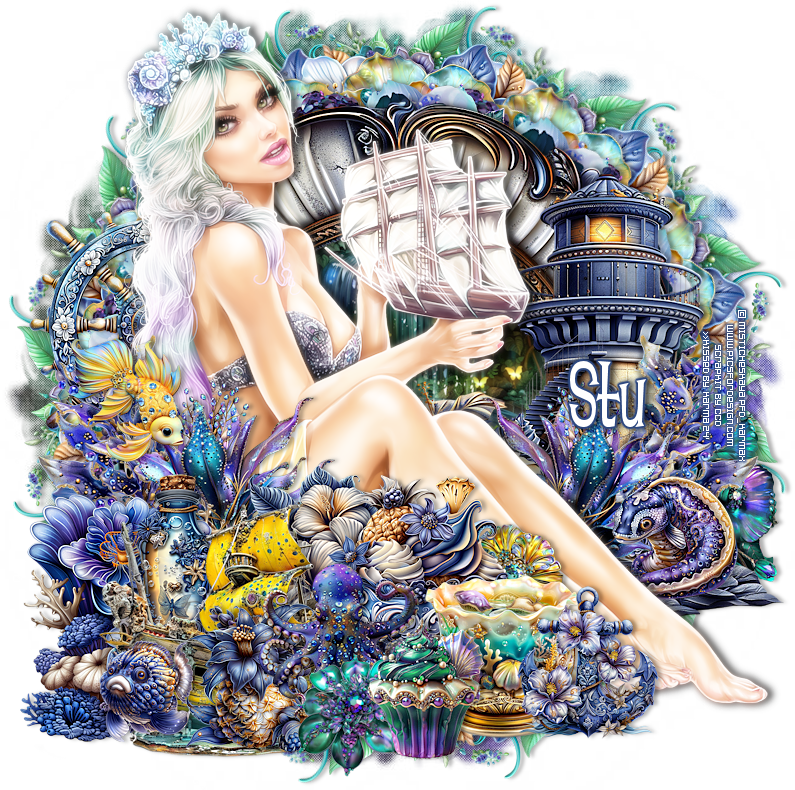
This tutorial was written by Ashley Zimmerman on 8/6/2024Any resemblance to any other tutorial is coincidental.Supplies I Used:PSP – I used 2020 but any version will doTube of Choice- Magical Song by MisticheskayaFont of Choice - I used Lounge BaitMask Used - Suz cmbbmask12I Used Stus kit Colors Of The Ocean HERE
**Abbreviations I use**DS- Drop ShadowLP-Layer PaletteRS-Resize
DONT FORGET TO SHARPEN and ADD DROP SHADOW to EVERY ELEMENT!
Drop Shadow used in this Tutorial is:V:0, H:4, Opacity:30, Blur 5.00
Lets Go!!
Open a new canvas 800x800Drag frame 4 onto your LP & RS 60% - Objects-Align-Center in CanvasDrag paper 6 onto your LP below your frame layer and RS 60%activate your frame layer select your magic wand , click inside the frame- selections-modify expand by 5-selections-invertactivate your paper layer and hit delete
Drag element 97 onto your LP & RS 40%Plugins- Mura Meister Copies- Encircle with these settings
drag below your paper layer objects-align-center in canvasDrag element 88 onto your paper & RS 30%Muras Meister - same settings as above drag below element 97 objects-align-center in canvasDrag element 102 onto your LP & RS 30%Muras Meister - change Shift X and Shift Y to 60place between element 97 and 88 objects-align-center in canvasDrag element 86 onto your LP & RS 45%Muras Meister (60 for Shift X and Shift Y)move below element 88 objects-align-center in canvasfor all of your flower layers sharpen them and add ds (V:0, H:4, Opacity:30, Blur 5.00)
C&P your tube layer above your frame layer and RS 43%place to the leftSharpen , Duplicate, Adjust-Blur-Gaussian Blur 3.00Blend mode ScreenMerge down into your main tube layer add DS change your settings to these
(V:0, H:4, Opacity:80, Blur:10.00)
Drag element 67 onto your LP place above your tube layer to the left of her feet(I want her feet showing)Drag element 54 onto your LP & RS 65% and place above your paper layerDrag element 15 onto your LP & RS 20% place below element 67 to the left and up a little bitDrag element 48 onto your LP & RS 30% place above element 67 to the left Drag element 91 onto your LP & RS 20% place below element 48 to the leftDrag element 89 onto your LP & RS 20% place below element 15 to the left and up a little bitDrag element 83 onto your LP & RS 35% place below element 91 as shown in tagDrag element 73 onto your LP & RS 40% place above element 89 a little to the left as shown in tagDrag element 70 onto your LP- Image-Free Rotate-Left-Free 20 and RS 20% place below element 15 to the rightDrag element 23 onto your LP & RS 10% place above element 73 to the leftDrag element 20 onto your LP & RS 20% place above your tube layer to the leftDrag element 18 onto your LP & RS 25% place below element 20 to the left (ignore the following step below if you are using a different tube) activate your tube layer and get your eraser tool to erase any tube showing on the bottom leftDrag element 79 onto your LP & RS 40% place below element 18 slightly to the right Drag element 80 onto your LP & RS 40% place below element 79 slightly to the left Drag element 75 onto your LP & RS 20% place above element 79 as shown in tagDrag element 12 onto your LP & RS 15% place below element 83 slightly to the leftDrag element 8 onto your LP & RS 15% place above element 67 to the rightDrag element 10 onto your LP & RS 45% place below your tube layer to the right Activate element 79 and duplicate iton the duplicate - Image-Mirror Horizontal and move below your tube layer- rename this 79 rightActivate element 80 and duplicate iton the duplicate - Image- Mirror Horizontal and move below your 79 right elementDrag element 19 onto your LP & RS 13% place below your tube layer to the right to where it is on the rocksDrag element 93 onto your LP flip horizontal & RS 35% place below element 10 to the right grab your eraser tool and erase the little bit peeking underneath the rock at the bottomDrag element 11 onto your LP & RS 25% place below your tube layer all the way to the leftDrag paper 7 onto your canvas move this all the way to the bottom and add your maskadd copyright and name(s)and we are done!
Hope you enjoyed!
xx




Thank you for this awesome tutorial.
ReplyDelete